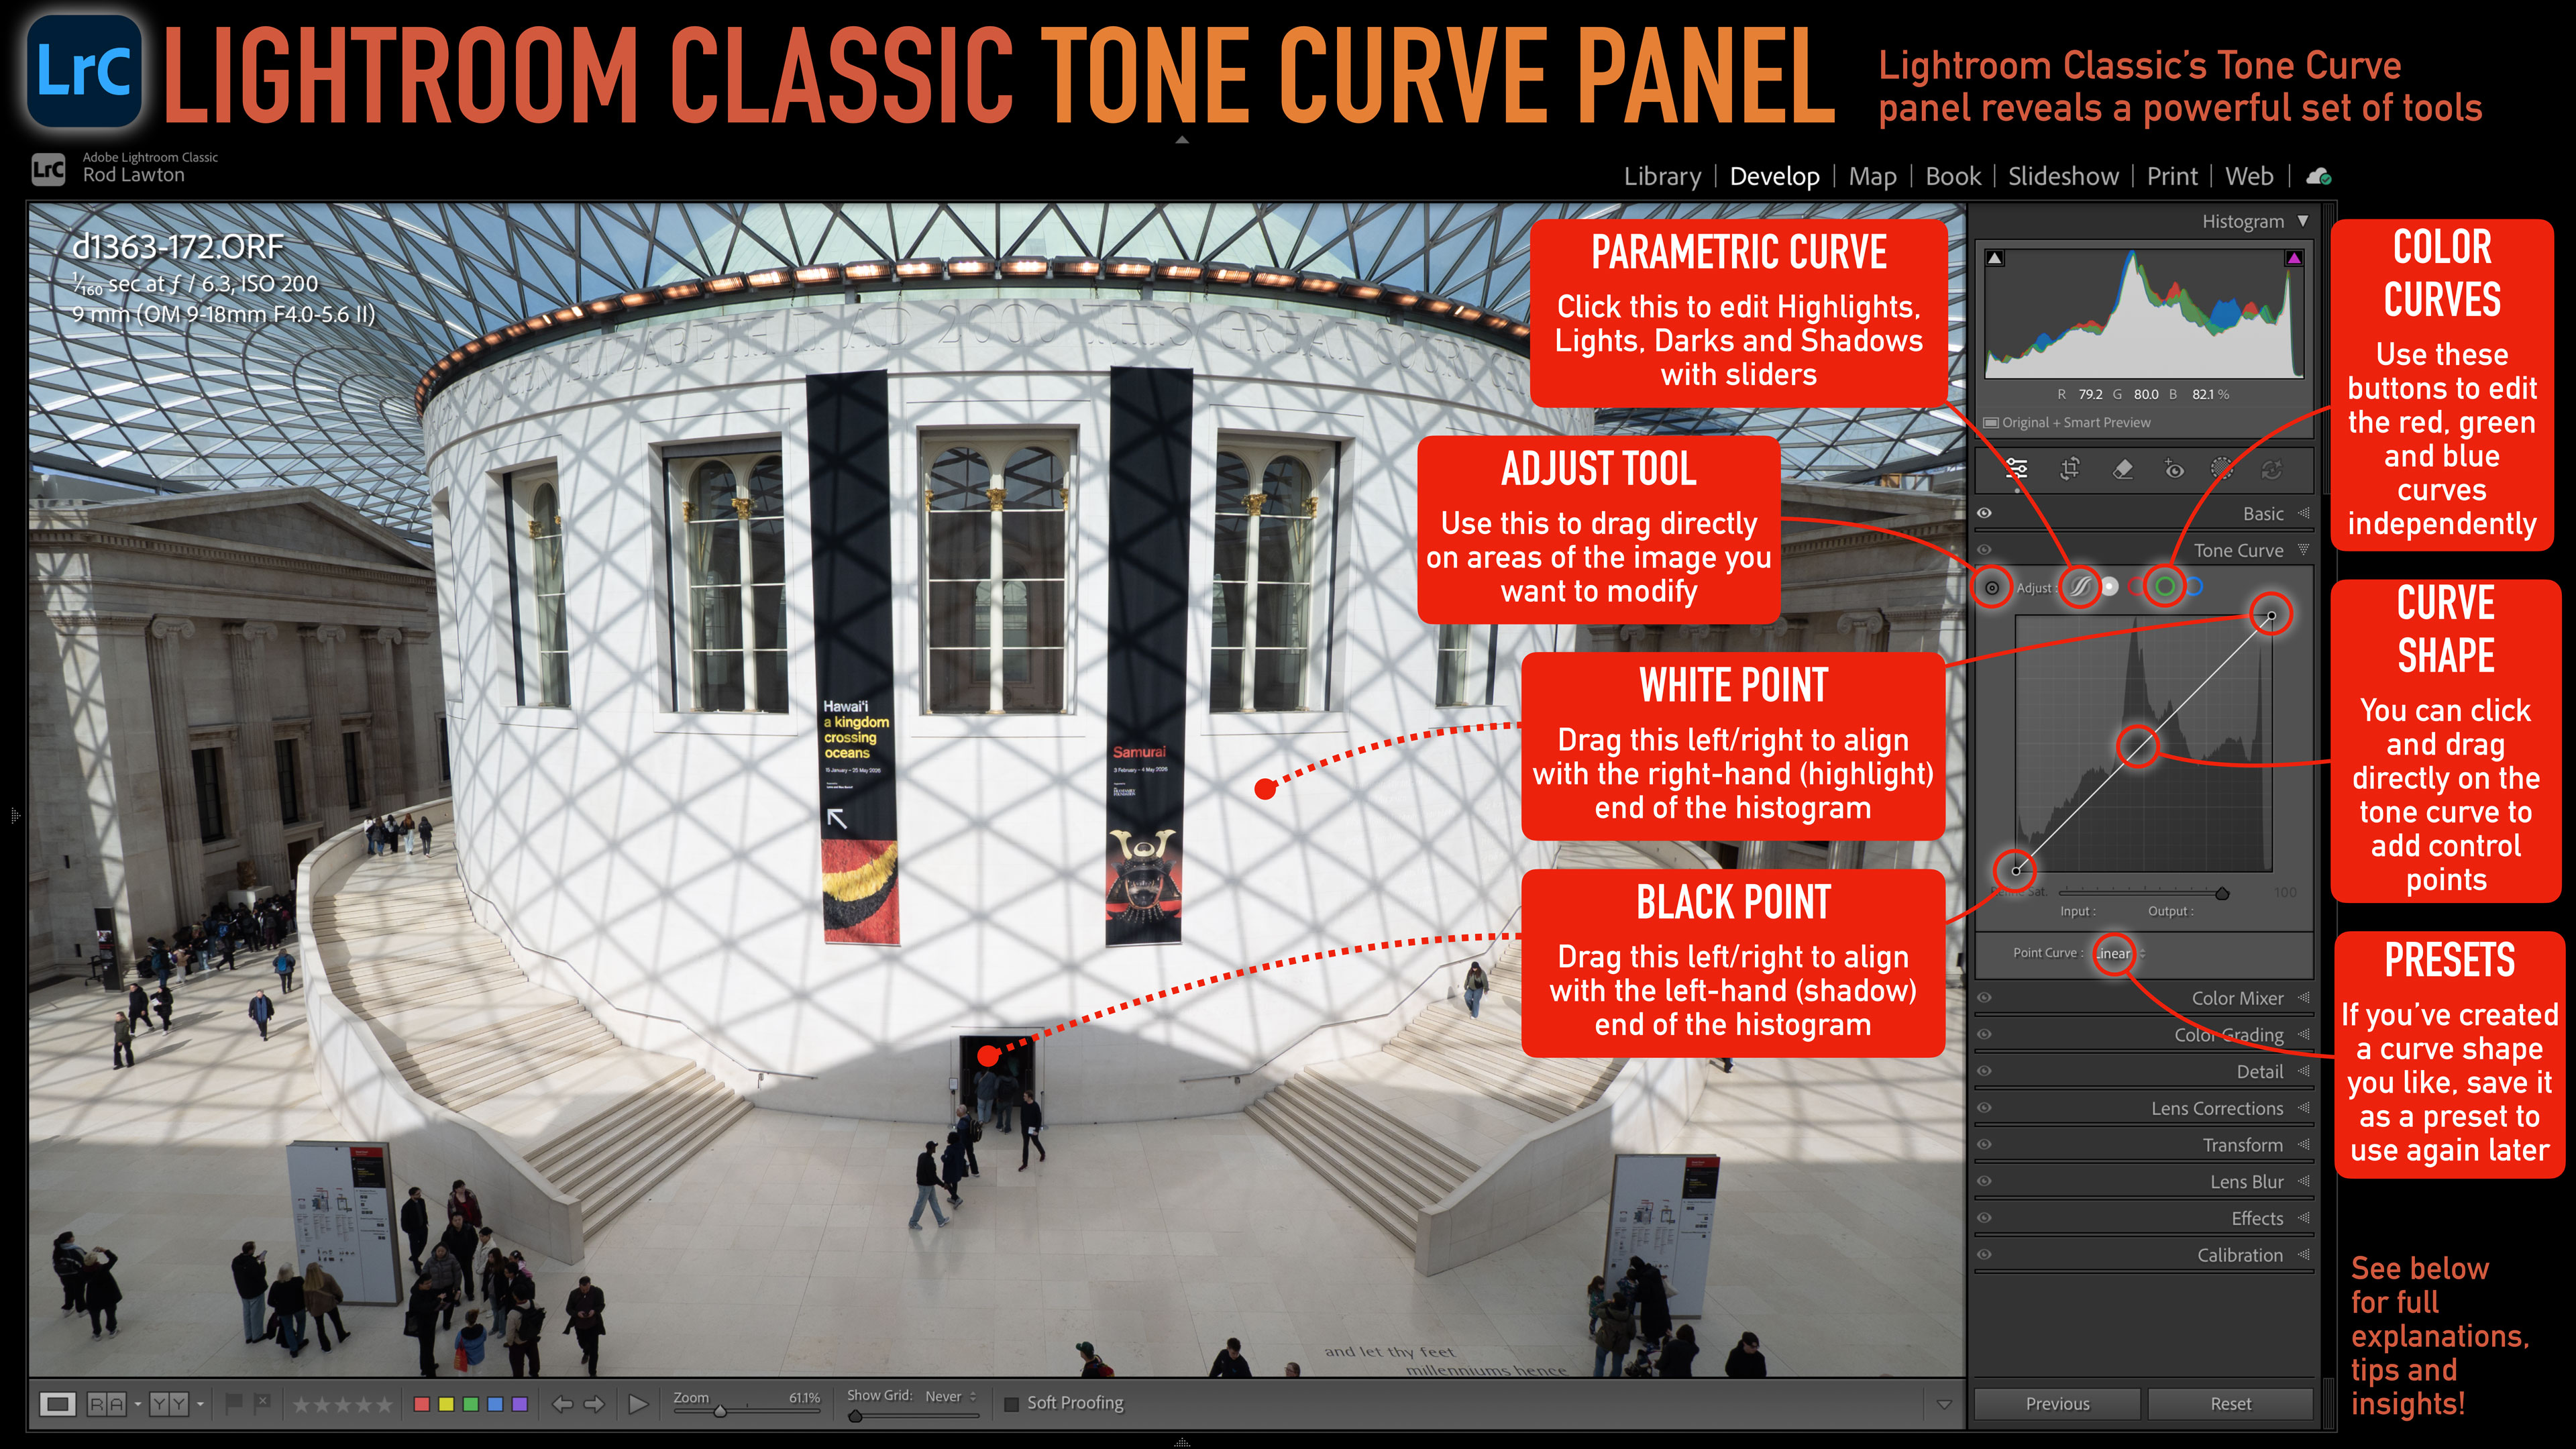
Understanding Tone Curve Adjustments
Tone Curve adjustments are a powerful tool for modifying the tonal range and contrast of your photos. The basic principle is straightforward – by dragging on the curve, you can change its shape to alter the brightness of different tonal regions, from the shadows on the left to the highlights on the right. However, Lightroom Classic’s Tone Curve panel has hidden depths that are often overlooked but significantly enhance its power and intuitiveness. Here’s a guide to the key features.
Parametric Curve
An alternative method for making curve adjustments is the Parametric Curve. Instead of dragging control points directly on the curve, which can sometimes be imprecise, this feature provides sliders for Highlights, Lights, Darks, and Shadows. These sliders allow you to adjust these tonal regions individually. Adjustments made with one slider will slightly influence the others to maintain a smooth tone curve.
- Try boosting the Lights slider to add brightness and sparkle to flat-looking images.
- Try reducing the Shadows slider to add depth and contrast to an image.
Adjust Tool
Clicking on this tool activates it, allowing you to click and drag up or down on any area or object in the image to adjust its tone value. This adjustment will be reflected in the tone curve. This is an effective way to target specific tonal values and objects only.
- You can use this tool to increase the contrast between two similar tonal values. Click and drag on one area to lighten it, then click on the other and drag down to darken it.
White Point and Black Point
You can drag the white point to the left if the image histogram doesn’t quite stretch to the right-hand side. Similarly, you can drag the black point slider to the right to meet the left edge of the histogram. Lightroom Classic does not have a separate levels adjustment, but this function serves the same purpose.
- For a faded analog ‘matte’ look, you can drag the black point slider upwards so that the darkest tones in the image don’t quite go to a solid black.
RGB Color Curves
Normally, you would work with combined curves adjustments to adjust all three color channels in the image at the same time. However, you can also edit the red, green, and blue color channels individually to create a wide range of color shifts and effects.
- Using RGB curves to adjust colors can get confusing. Consider using the Color Grading panel instead!
- If you want to adjust individual colors, the Color Mixer panel, especially its Point Color mode, is essential.
Curve Shape
To change the shape of the curve, simply drag on the line or click to add a control point, which you can then move around to reshape the curve. You can add as many points as you like, but things can quickly become messy, so it’s best to keep it simple.
- A classic 'S-shape' curve will add midtone contrast to a photo without clipping the shadows or highlights. Use one control point to lower the darker tones and another to raise the lighter tones.
Curve Presets
This small drop-down menu is easy to miss but very useful if you find yourself making the same curve adjustments repeatedly.
- To save a curve preset, make your curve adjustments first and note that the menu now shows ‘Custom’. Open the menu, choose the Save option at the bottom, and name your new preset.
Komentar (0)