Quick Guide: Black and White Tools in Lightroom Classic
Monochrome Mastery in Lightroom Classic
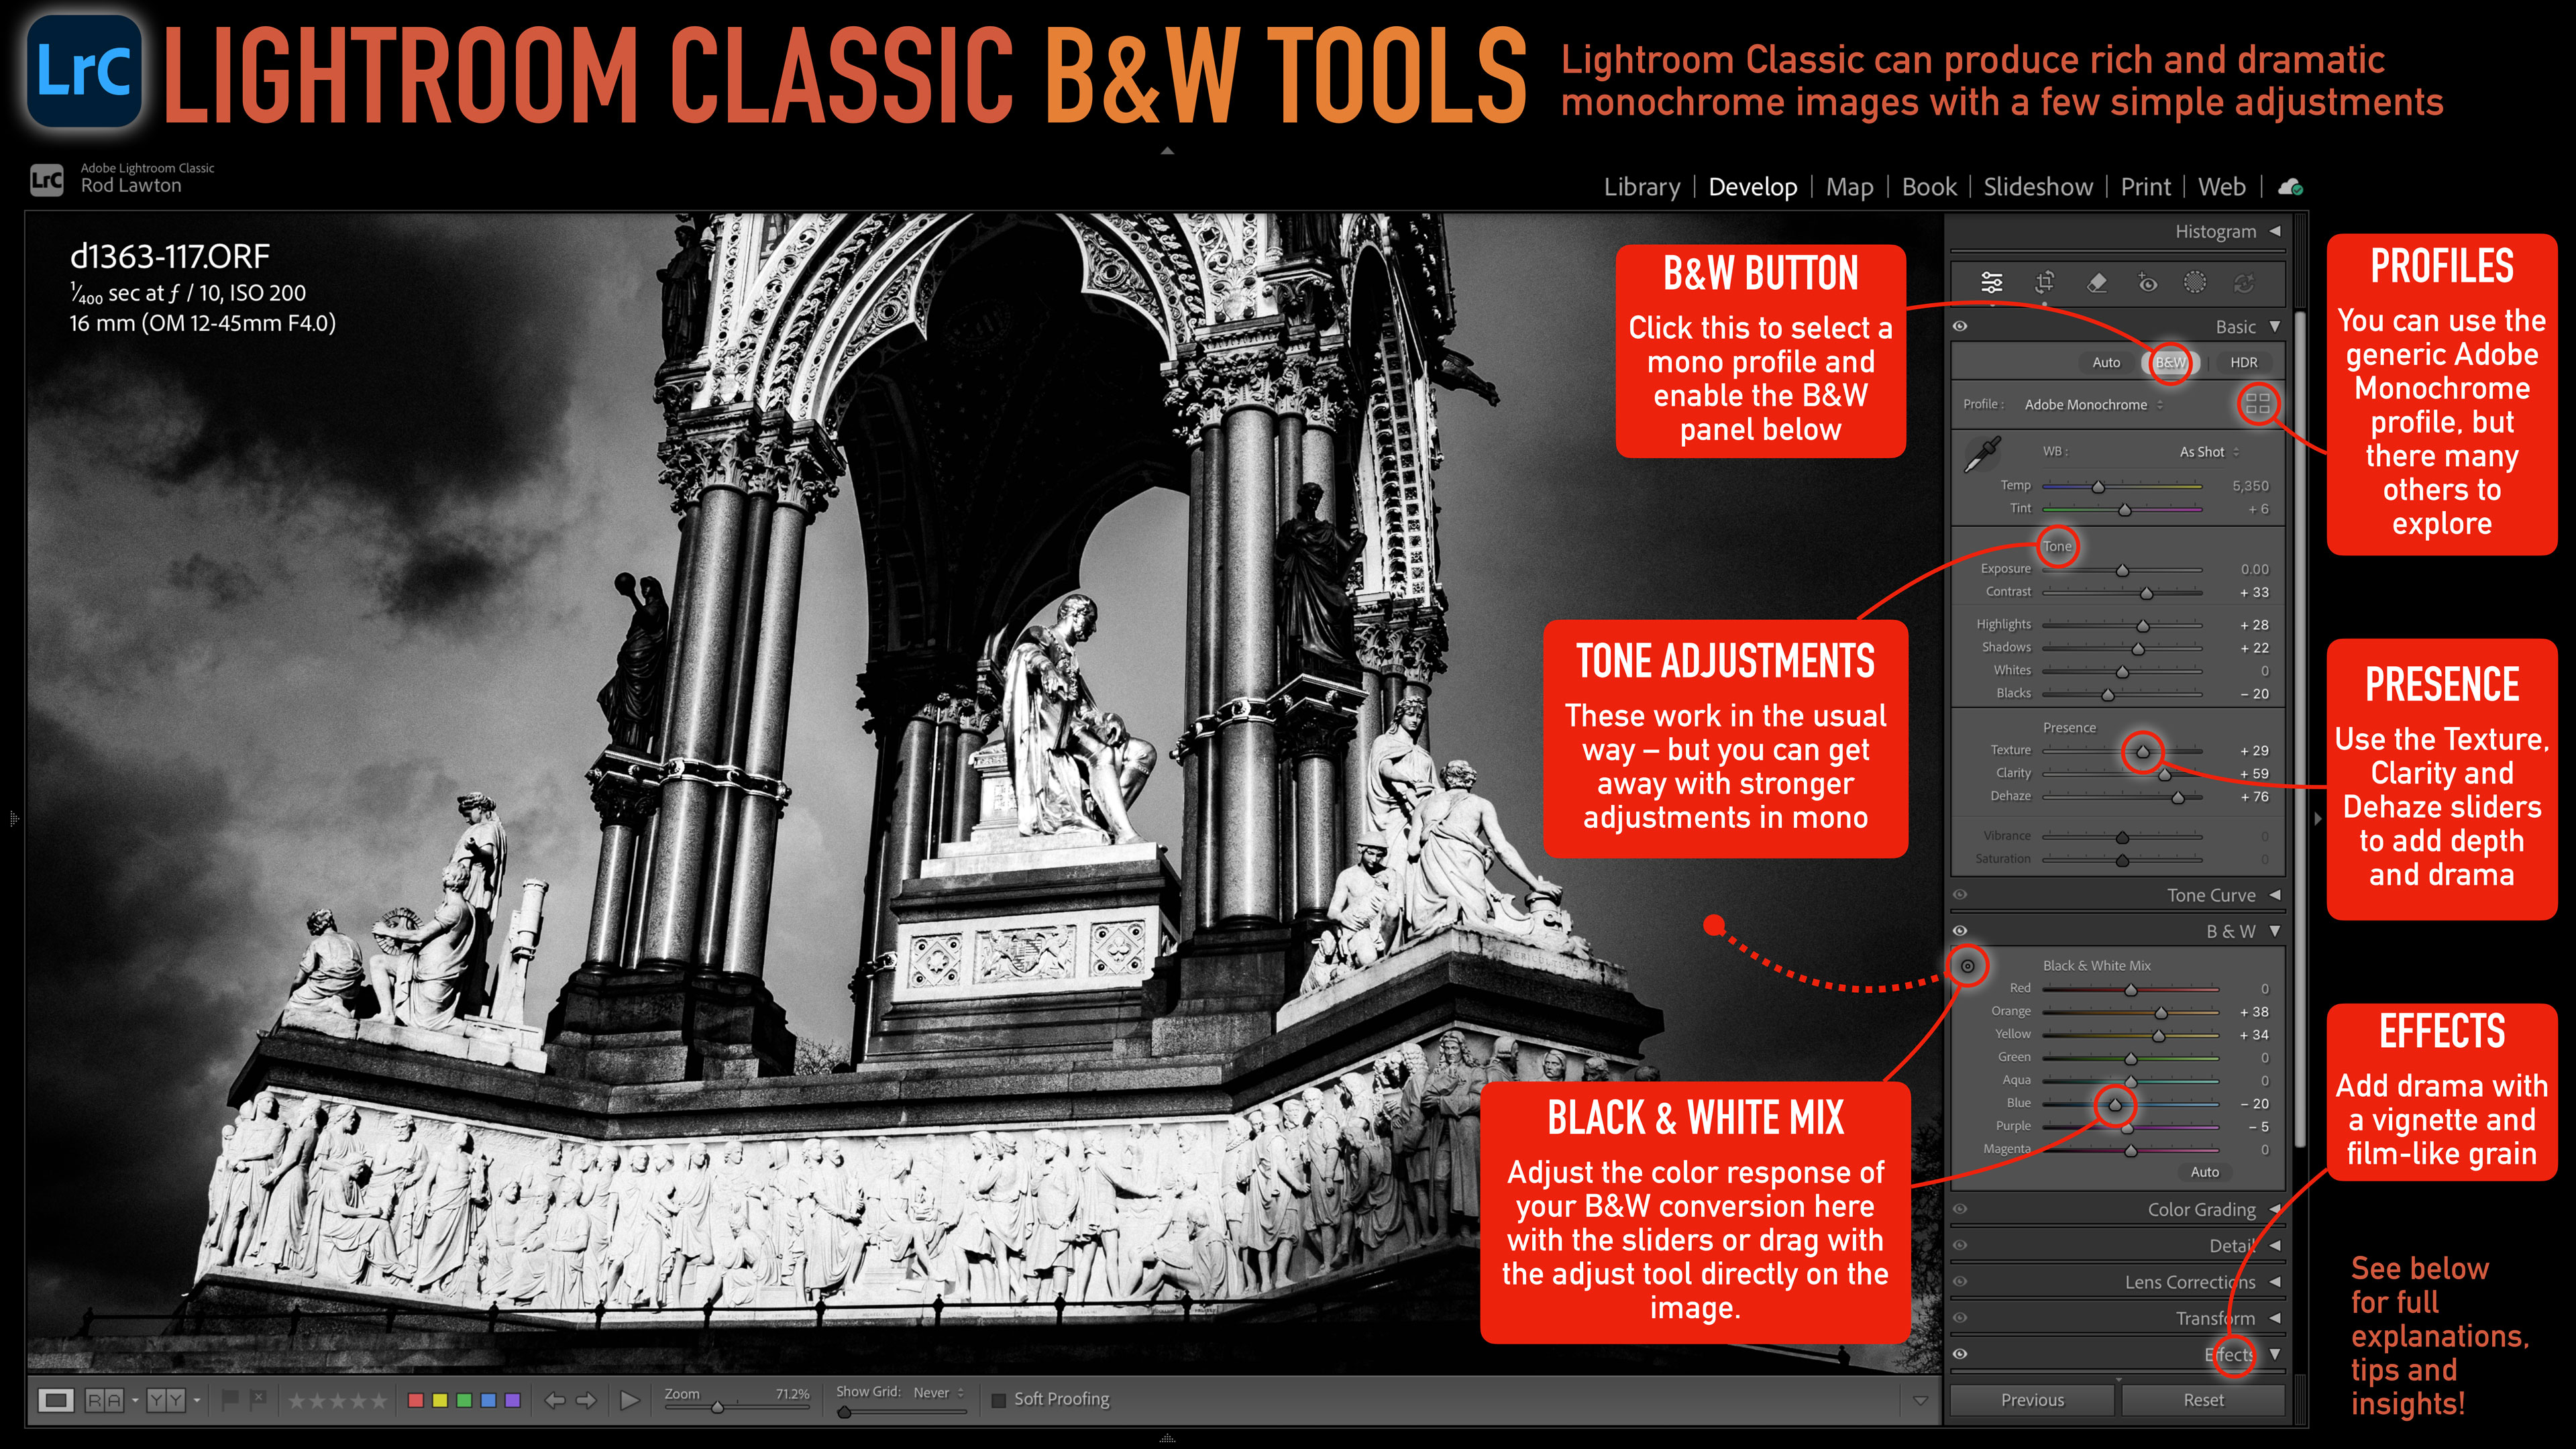
Lightroom Classic offers a range of powerful tools for black and white photographers, even without the need to use advanced masking techniques for dodging and burning. Unlike color photography, where images can often be used directly from the camera, black and white photography typically requires some additional work in the digital darkroom. Images captured in black and white mode on the camera can benefit from careful adjustments to contrast, clarity, and color mixing to truly bring them to life. Here are some essential tools in Lightroom Classic that can help achieve monochrome mastery.
B&W Button
Located at the top of the Basic panel, the B&W button switches the Develop tools from regular color editing to monochrome. The key difference is that the Color Grading panel is replaced with the B&W panel, allowing you to apply the same color mixing tools that are found in Photoshop’s Channel Mixer and B&W adjustment layers.
While it is possible to convert color images to black and white by reducing the Saturation value to zero, the B&W mode is specifically designed for this kind of work. It provides a more refined and controlled approach to creating black and white images.
B&W Panel
The B&W panel displays eight different color ranges that can be adjusted and 'mixed' to create your black and white conversion. When you reduce the value of a color, it appears darker in the black and white image; when you increase the value, it becomes lighter. For example, to make blue skies darker and foliage lighter in landscape shots, you would reduce the Blue value and increase the Green.
If you apply larger adjustments, try shifting adjacent color sliders slightly in the same direction to blend the adjustment more subtly. Be mindful of edge effects around objects if you apply too strong an adjustment to darken blue skies, for instance.
The Adjust gadget can save a lot of time. Select it and drag up and down on areas of the image to darken or lighten those colors.
Tone Adjustments
Tone adjustments work in the normal way, but you’ll find that you can often push the Contrast and other values further than you would with color images. Black and white is more forgiving of extreme adjustments, which can often enhance the graphic impact.
Use the histogram display at the top to check for clipping, but you can often afford to lose more highlight and shadow detail than with color images.
Presence Sliders
The Presence sliders require a bit of care when working on color images, but in black and white, you can go wild. As a medium, black and white is already more dramatic and theatrical than color, and the Texture, Clarity, and Dehaze sliders can really add to the impact of an image.
- The Texture slider is good for adding micro-contrast to details in the image.
- Use the Clarity slider to make objects stand out and give a lift to flat-looking images.
- The Dehaze slider adds drama to skies and gives darker tones a lift. In color, it can often add too much color saturation, but in black and white, that's not a problem!
Profiles
It's easy to overlook the Profiles in Lightroom Classic. While the default Adobe Color and Adobe Monochrome profiles will do a decent job, it's definitely worth clicking the Browse button to look through all the other profiles available. Lightroom comes with a selection of bespoke B&W Profiles, each delivering a unique 'look'.
These profiles are not like presets. They are like a pre-processing step that doesn't involve the editing tools at all.
Effects Panel
The Effects panel has two great tools for black and white photographers. The Post Crop Vignetting tool adds subtle corner shading to increase the contrast in your photos and add a framing effect to aid the composition. The Grain effect offers a very realistic simulation of actual analog film grain.
You can get into the nitty gritty of the Grain Size and Roughness sliders if you like, but for quick and convincing results, you can leave them at their defaults and just use the Amount slider.