Create Glowing Art with Free NASA Sun Images: A Step-by-Step Guide
A Glowing Connection Between the Sun and Neon Lights
The vibrant colours of the Sun captured in images from NASA’s Solar Dynamics Observatory (SDO) have an unexpected visual match: the neon lights that illuminate the Las Vegas Strip. This resemblance is more than just superficial. Both the Sun and neon signs involve low-pressure gas glowing when energised. Around the Sun, this phenomenon occurs due to intense heat and radiation, while inside a neon tube, it’s the result of an electric current.
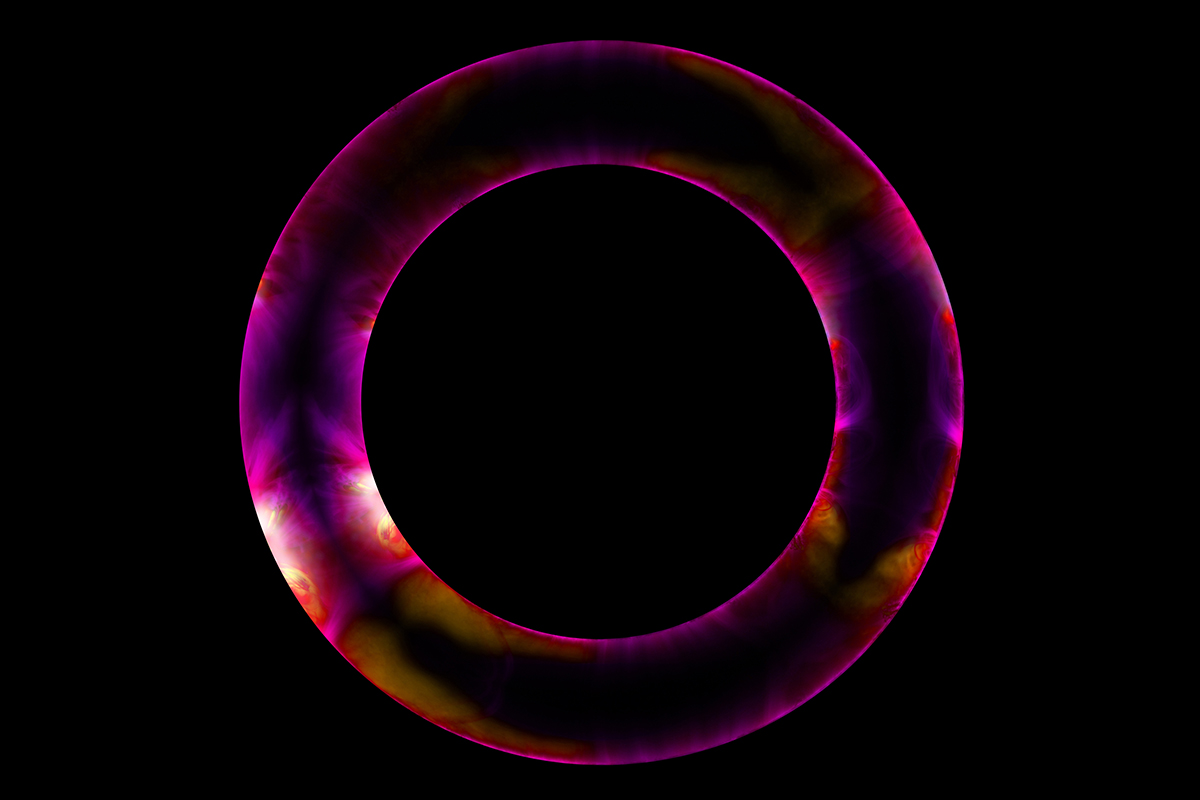
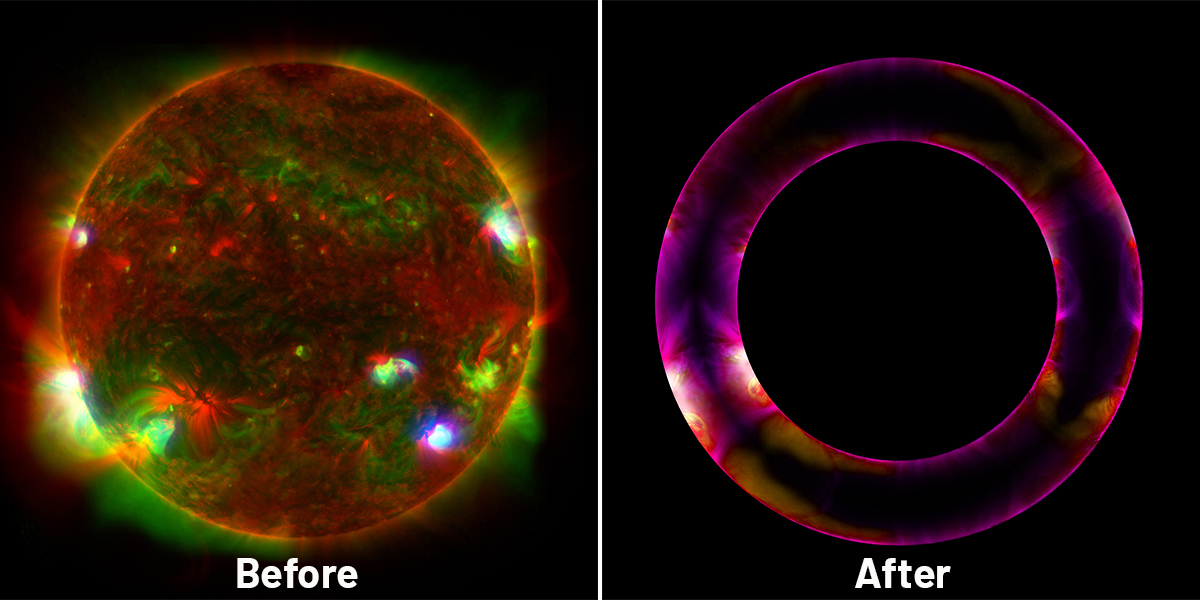
This same principle is responsible for the glowing appearance of emission nebulae, where ultraviolet radiation from hot O-type stars energises surrounding gas, making it shine in space. Inspired by this parallel, I created a project called 'Neon Sun', which reimagines our star as a glowing neon tube. The project was shortlisted in the Annie Maunder open category of 2025’s Astronomy Photographer of the Year competition. Here’s how I brought this vision to life.
Accessing NASA Solar Data
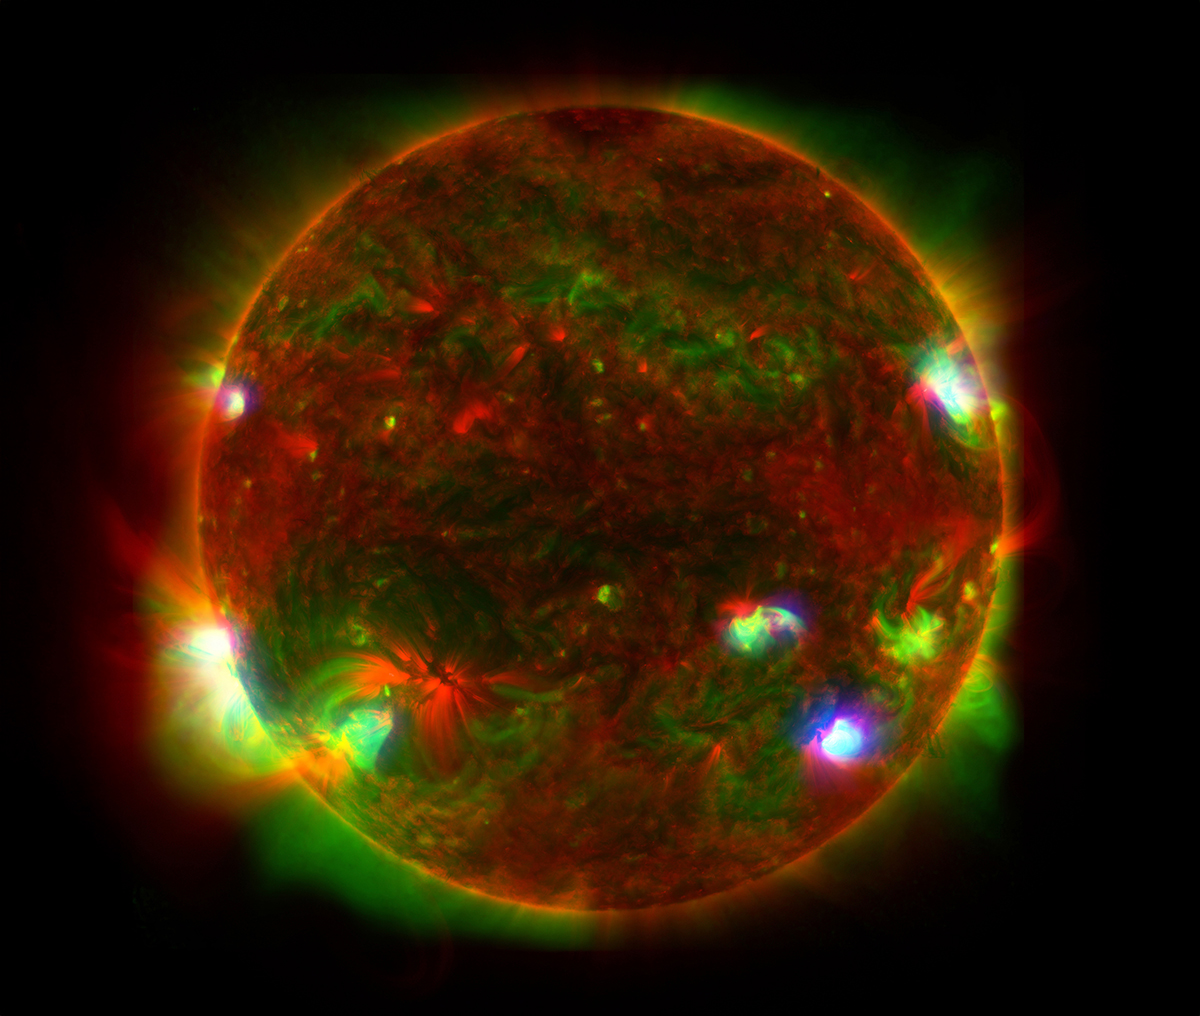
To begin, you can download a vast range of free SDO images from the Solar Dynamics Observatory website. Navigate to the site’s Data tab, select ‘AIA/HMI Browse Data’, and click ‘Frames Download’ to access full-resolution 4,096-pixel images in multiple wavelengths. There is no single 'correct' image to choose, but multispectral frames with interesting structure, contrast, and colour variation will yield the most engaging results.
For this walkthrough, we used an image labelled PIA25628_large, which you can see below.
Preparing Your Canvas
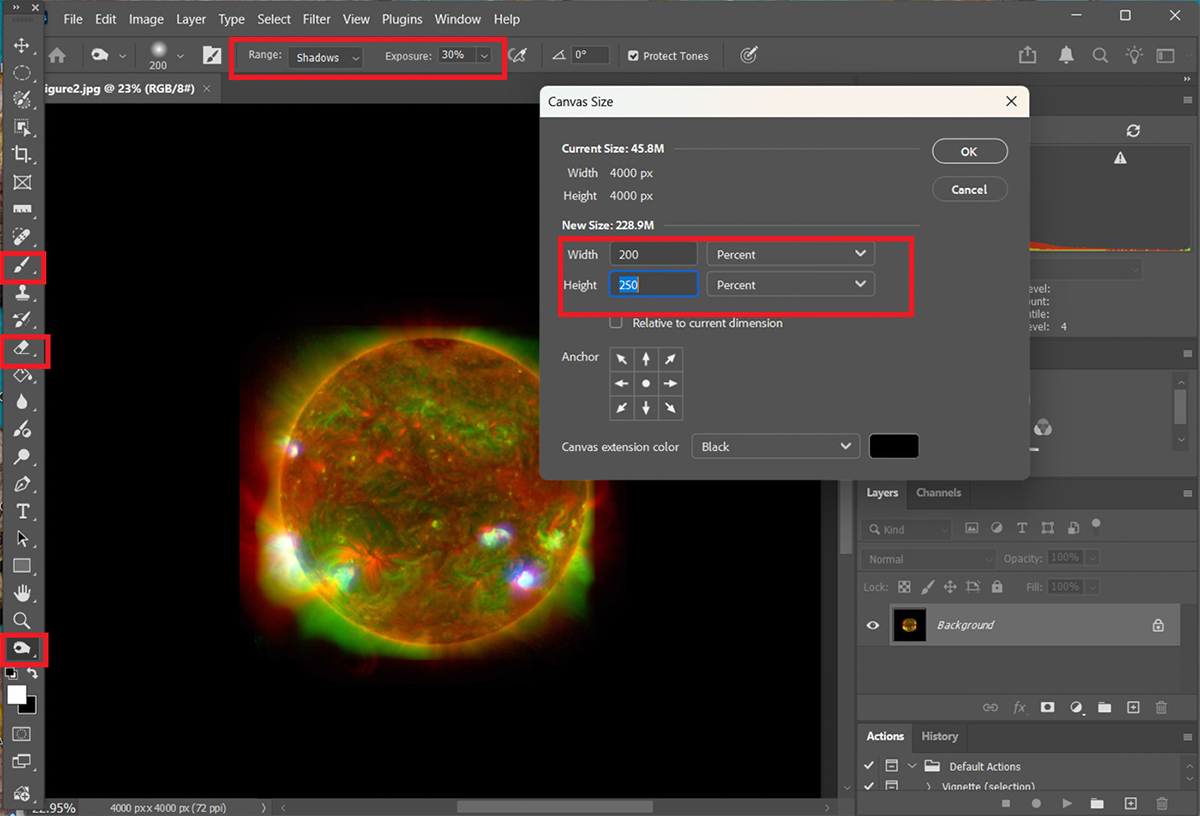
SDO images are typically tightly cropped around the Sun and may include labels or overlays that need to be removed. To create working space for the transformations ahead, start by opening your image in Photoshop and clicking Image > Canvas Size (see image below). Extend the canvas by approximately 200%, filling the new area with black (RGB 0,0,0).
If your image has labels or overlays, remove them using the Brush, Eraser, or Burn tools. Extending the canvas may reveal sharp 'cut-off' points that create odd straight edges in your processed data (see examples in the image below). These can be softened by reducing the image’s outer glow. Applying a brush from the Burn tool, set to 'Shadows' with an exposure of about 30 per cent, works well for feathering these sharp edges to give them a natural look.
Creating an Eclipse Effect
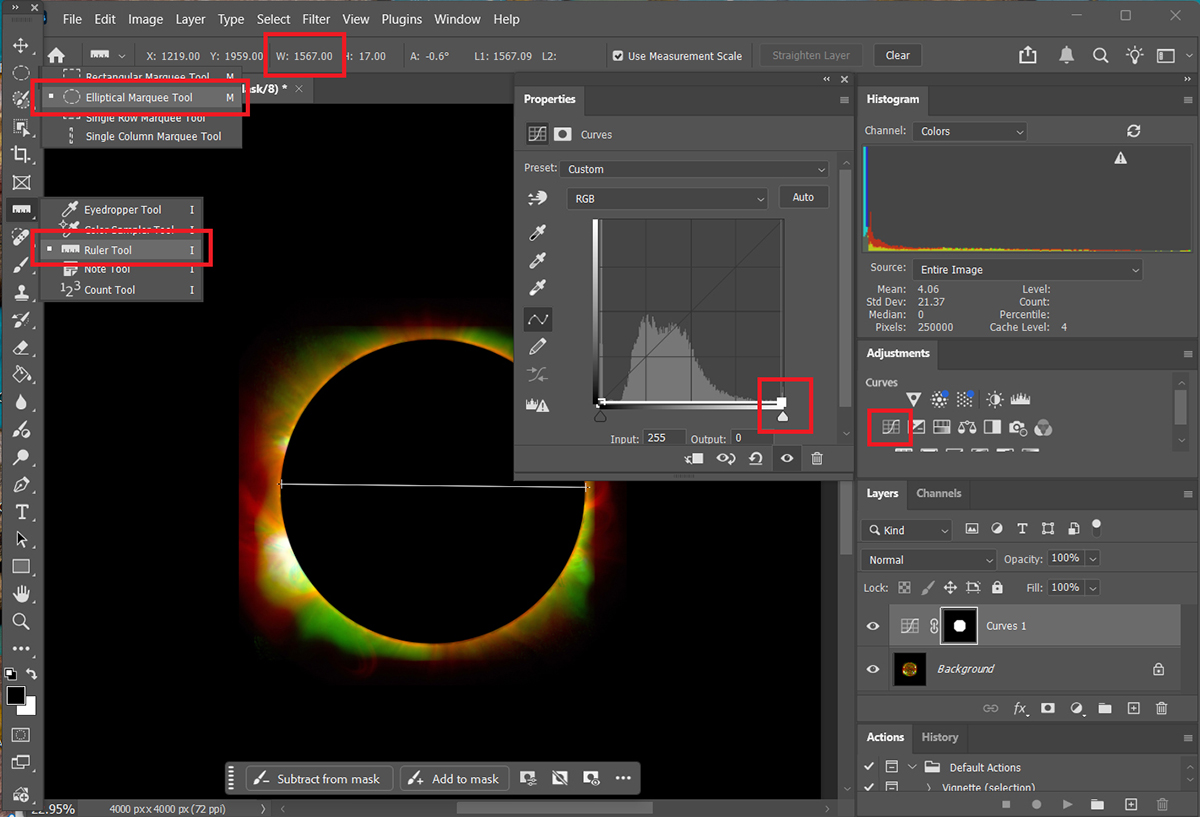
Next, give the Sun a 'total eclipse' appearance by removing the bright solar disc. Use the Ruler tool to measure the Sun’s diameter in pixels. If you can’t see a ruler icon, it’s often nested under the Eyedropper tool. Drag the ruler across the disc to measure its diameter. Select the Elliptical Marquee tool (highlighted, image below), set the Style to Fixed Size, and enter this diameter. Position the selection so that it’s perfectly centred on the disc. With the disc selected, click Image > Adjustments > Curves. Pull the top of the curve down to zero, turning the disc completely black (see image below). You should now have an eclipsed Sun surrounded by a subdued corona.
Transforming into a Neon Tube
To create the neon-tube effect, the image needs to first be mirrored, then turned 'inside out'. Duplicate your layer (right-click > Duplicate Layer), then click Filter > Distort > Polar Coordinates > Polar to Rectangular. Your corona will transition from circular to a horizontal line. Click Edit > Transform > Flip Vertical, then apply Filter > Distort > Polar Coordinates > Rectangular to Polar. This sequence effectively redirects the corona so that it points inward rather than outward.
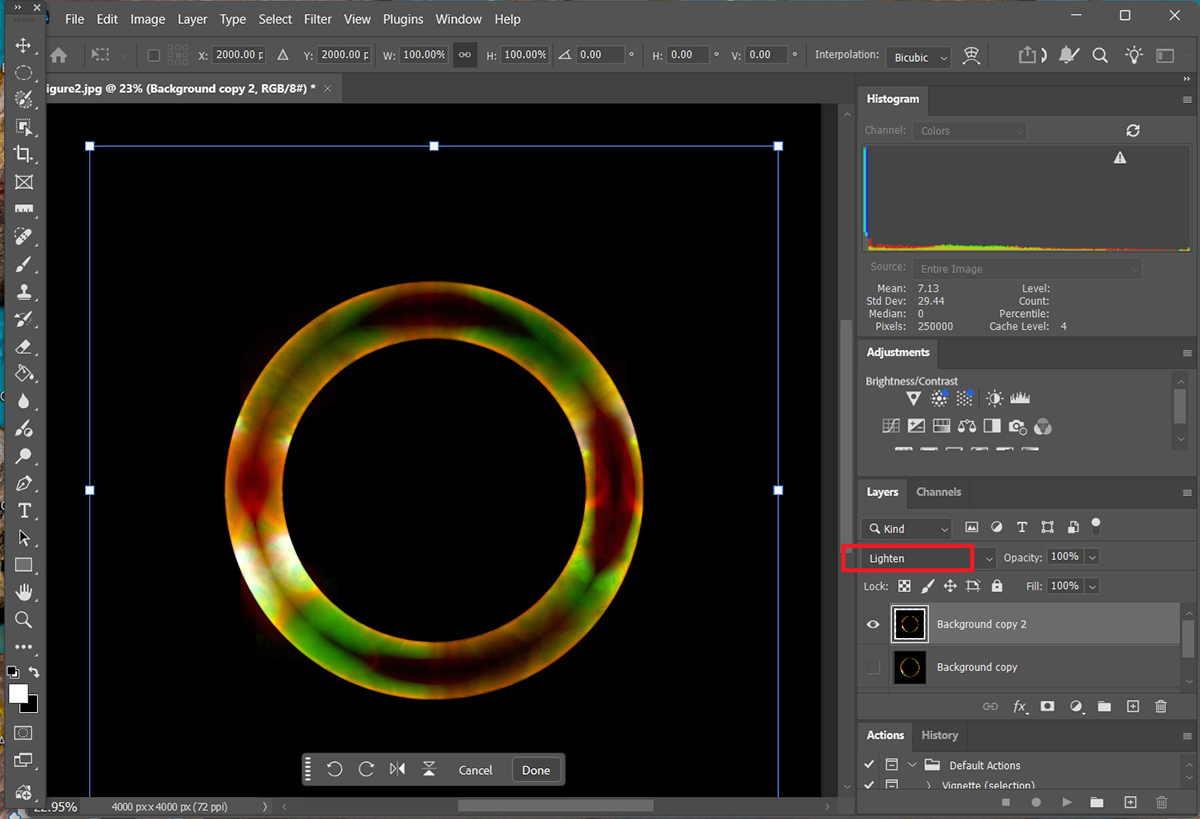
Duplicate the layer again and set the blending mode to 'Lighten'. Use Edit > Transform > Scale to resize the outer layer (see image below). Holding Alt while dragging a corner maintains the layer’s aspect ratio. Expand it until the result looks balanced, forming a glowing ring that encases the Sun like a neon tube. Once you’re happy, right-click and select 'Flatten Image'.
If you want to make the colours look more like neon signage, use Image > Adjustments > Hue/Saturation. Boost saturation by around 20 units, then gently move the Hue slider to the left. Greens will slide toward yellows, reds, and magentas. Adjust these settings gradually until the colours feel vibrant but not garish.
Quick Tips for Success
- Start with SDO data files that show interesting coronal brightness, contrast, and colour variations
- Use high-resolution SDO data (4,096 x 4,906 pixel) if possible. It will produce the finest detail and variation in your final image
- Don’t be afraid to experiment with different hue and saturation levels
Send us your best images by emailing contactus@skyatnightmagazine.com.
